2100D データシートの表示(PDF) - Systemsensor advanced ideas.
部品番号
コンポーネント説明
メーカー
2100D Datasheet PDF : 4 Pages
| |||
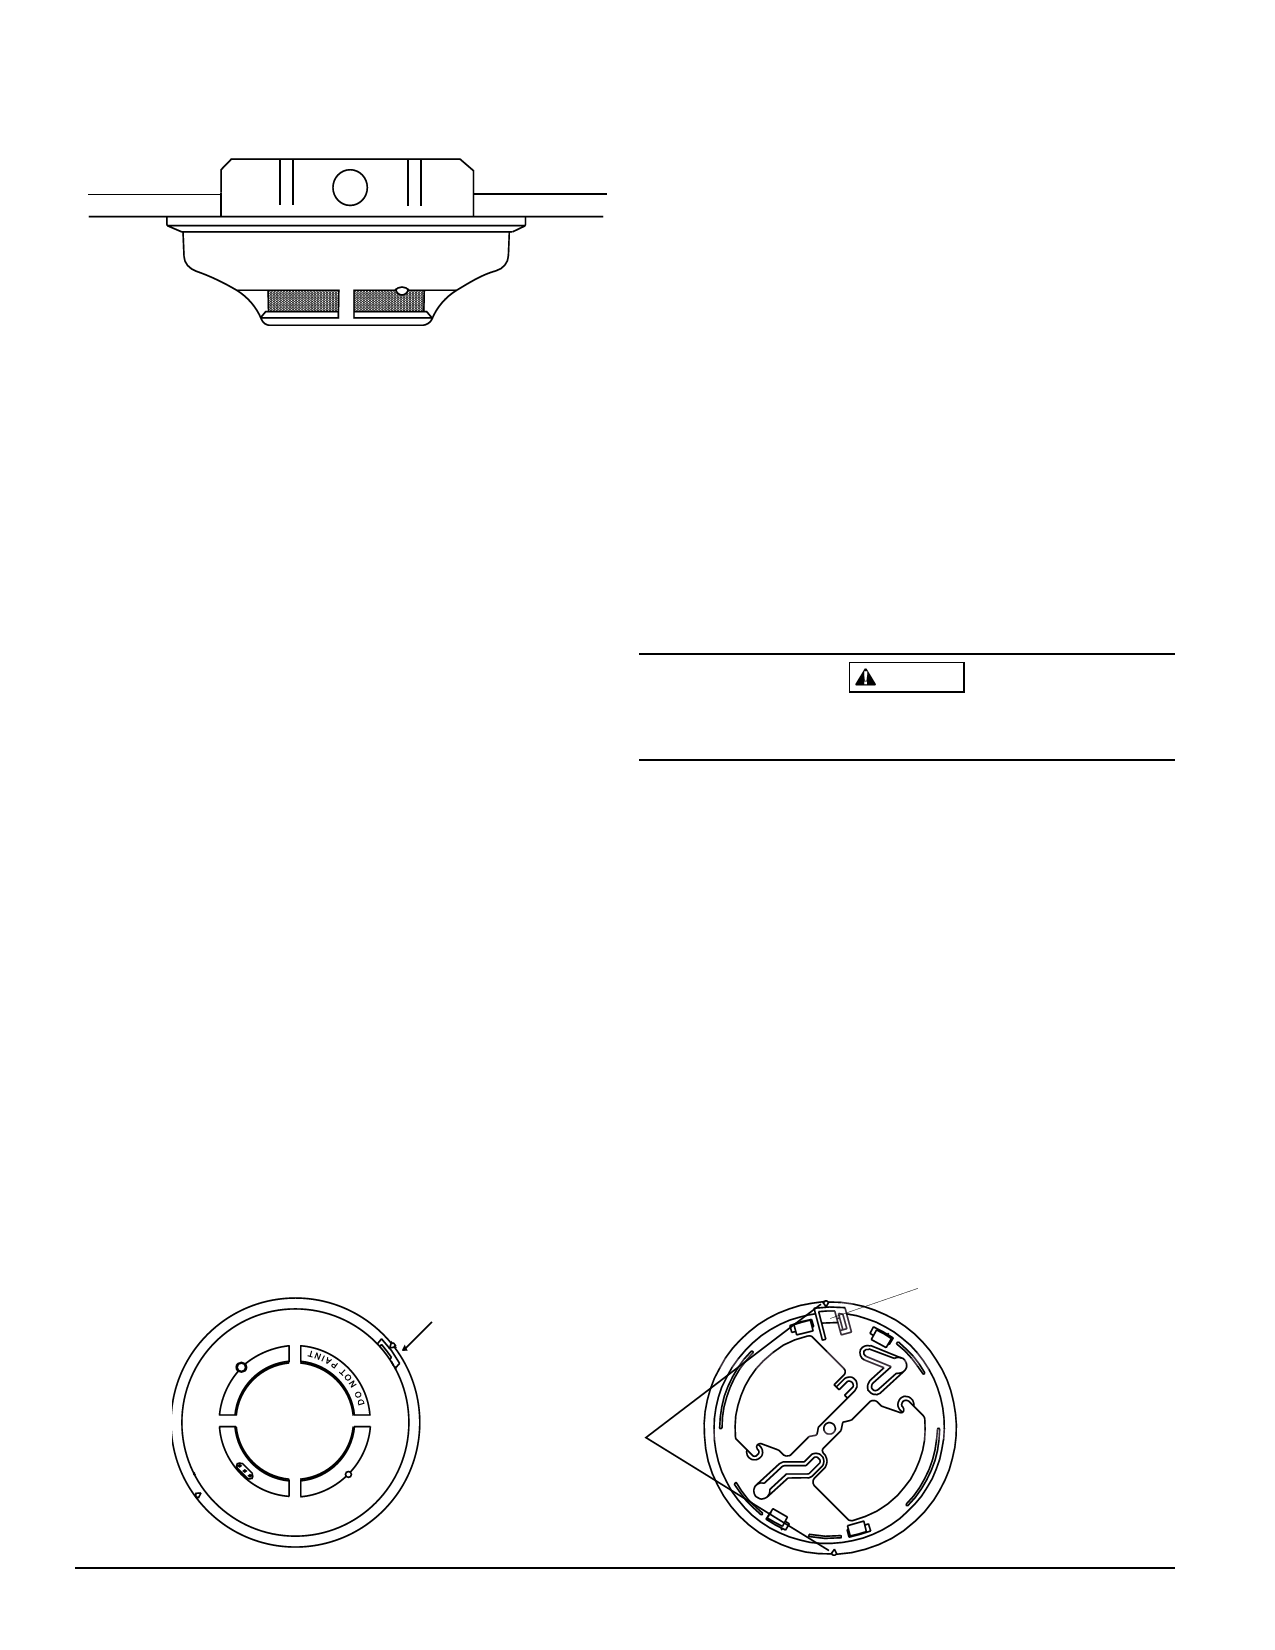
Figure 1. Surface mounting of 2100D smoke detector
on 3 1/2-inch and 4-inch octagonal box:
The screw terminal block will accept 14 – 22 gauge wire.
For best system performance, all wiring should be installed
in separate grounded conduit; do not mix fire system wiring
in the same conduit as any other electrical wiring. Twisted
pair may be used to provide additional protection against
extraneous electrical interference.
A78-2563-00
Wire connections are made by stripping about 1/4 inch of
insulation from the end of the feed wire, inserting the wire
into the appropriate terminal, and tightening the screw to
secure the wire in place.
Mounting
Each 2100D and 2100TD detector is supplied with a mount-
ing bracket that permits the detector to be mounted:
1. To a single gang box, or
2. Directly to a 31/2-inch or 4-inch octagonal box, or
3. To a 4 inch square electrical box by using a plaster ring.
Tamper-resistance Feature
This detector includes a tamper-resistant feature that pre-
vents its removal from the bracket without the use of a
tool. To make the detector tamper-resistant, remove the
smaller tab by breaking it at the scribed line on the tamper-
resistant tab on the detector mounting bracket (see Figure
2), then install the detector. To remove the detector from
the bracket once it has been made tamper resistant, use
a small screwdriver to depress the tamper-resistant tab,
located in the slot on the mounting bracket, and turn the
detector counterclockwise.
Wiring Installation Guidelines
All wiring must be installed in compliance with the Na-
tional Electrical Code, applicable local codes, and any spe-
cial requirements of the local authority having jurisdiction.
Proper wire gauges should be used. The conductors used
to connect smoke detectors to control panels and accessory
devices should be color-coded to reduce the likelihood of
wiring errors. Improper connections can prevent a system
from responding properly in the event of a fire.
System Sensor smoke detectors are marked with a compati-
bility identifier located as the last digit of a five digit code
stamped on the back of the product. Connect detectors only
to compatible control units as indicated in System Sensor’s
compatibility chart which contains a current list of UL
listed compatible control units and detectors. A copy of this
list is available from System Sensor upon request.
Installation
WARNING
Remove power from the control unit or initiating-device
circuits before installing detectors.
1. Wire the plug-in screw terminal block per Figure 3 and
plug the terminal block into the detector.
2. Align the arrows on the detector with the arrows on the
mounting bracket.
3. Turn the detector clockwise in the mounting bracket un-
til it clicks into place.
4. After all detectors have been installed, apply power to
the control unit or initiating-device circuits.
5. Test the detector as described in the following
paragraph.
6. Reset the detector at the system control panel.
7. Notify the proper authorities the system is in operation.
Figure 2. 2100D and 2100TD smoke detector mounting bracket:
TAMPER SLOT
(DEPRESS TAB TO
REMOVE DETECTOR)
TAMPER RESISTANT TAB
(CUT OFF SMALL TAB TO
ACTIVATE TAMPER-RESIST
FEATURE)
D200-54-00
ALIGNMENT
ARROWS
2
A78-2333-01
I56-710-09
Share Link: 